Introduction
This document provides step-by-step instructions on connecting your Observability product to Amazon Web Services (AWS) using the AWS Integration with an External ID method. This integration allows you to access and monitor your AWS resources from within OpsRamp securely. The External ID adds an additional layer of security to the integration, enhancing access controls.
Prerequisites
Ensure you have the necessary IAM permissions to create IAM roles and policies in AWS.
Make sure you have the following permission to install the AWS integration:
“sts:AssumeRole”
AWS configuration
Step 1: Generate External ID
Log in to the OpsRamp portal.
Navigate to Setup > Account.
On the ACCOUNT DETAILS page, select Integrations and Apps.

The INSTALLED INTEGRATIONS page is displayed with all the installed applications.

Note: If there are no installed applications, it will navigate to the AVAILABLE INTEGRATIONS AND APPS page.
Click + ADD on the INSTALLED INTEGRATIONS page. The AVAILABLE INTEGRATIONS AND APPS page displays all the available applications along with the newly created application.Note: You can even search for the application using the search option available. Also, you can use the All Categories option to search.
Click ADD in the AWS application.

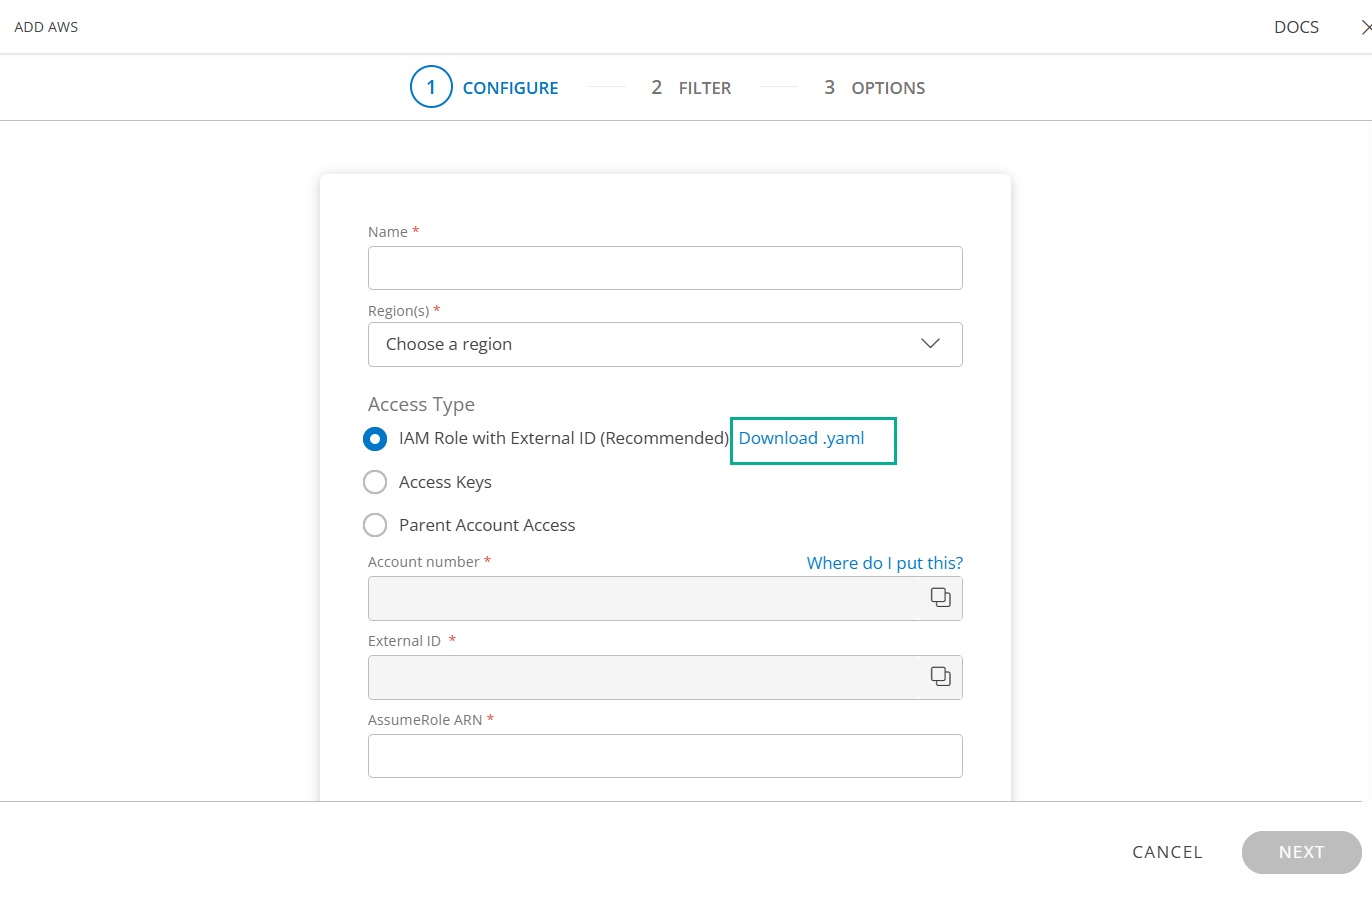
In the ADD AWS page, enter the account information:

| Functionality | Description |
|---|---|
| Name | (required) Enter the name for the integration. |
| Region | (required) Select the AWS region from the drop-down list. The services that belong to the selected regions are onboarded. You can select multiple regions to onboard the services.If you select two regions A and B, and if you are not authorized to access region B, onboarding fails for both regions A and B. |
| Integration type | (required) Select IAM Role with External ID (Recommended). |
| Account number | (required) The AWS account number is automatically populated. Copy the account number as you need these details to create a role in the AWS console. |
| External ID | (required) The External ID is automatically populated. Copy the External ID as You need these details to create a role in the AWS console. |
| AssumeRole ARN | The AssumeRole ARN is generated only after creating the role. To enter the ARN in this field, navigate to your AWS account and do the actions described in Step 3: Configure IAM Role in AWS. |
Step 2: Configure IAM Policy in AWS
Log in to your AWS Management Console.
Navigate to the IAM (Identity and Access Management) service.
Click Policies in the left-hand navigation pane.
Click Create Policy.

From the Create Policy page under Specify permissions, select JSON editor, and paste the following code:Note: To add more permissions, see Permissions for AWS Resource Discovery for more details about the permissions required for discovering AWS resources.
   {
    "Version": "2012-10-17",
    "Statement": [
        {
            "Sid": "VisualEditor0",
            "Effect": "Allow",
            "Action": [
                "mediapackage:DescribeOriginEndpoint",
                "mediapackage:DescribeHarvestJob",
                "opsworks:DescribeStacks",
                "opsworks:DescribeLayers",
                "opsworks:DescribeInstances",
                "opsworks:ListTags",
                "s3:ListAllMyBuckets"
            ],
            "Resource": "*"
        }
    ]
  }
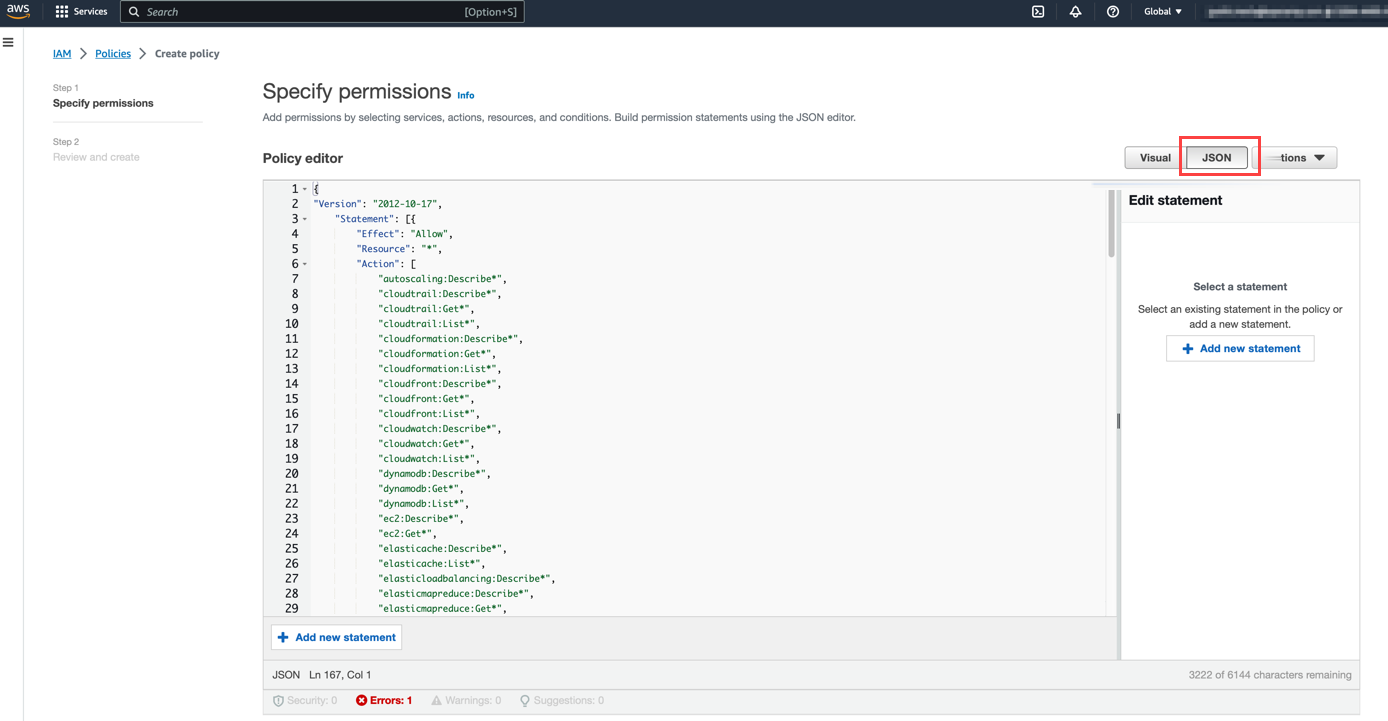
Click Next.
In the Review and create page, you need to provide a name for the policy.

Click Save.
Step 3: Configure IAM Role in AWS
Log in to your AWS Management Console.
Navigate to the IAM (Identity and Access Management) service.
Click Roles in the left-hand navigation pane.
Click Create Role.

On the Create role page, under the Select trusted entity type section, select AWS account.
Under An AWS account section, select Another AWS account.

Enter the OpsRamp account number and check the option for Require external ID.
Enter the External ID generated earlier in the corresponding field.
Click Next.
In the Add permissions section, find the policy created earlier.

Provide a name to the role.
Click Save.

Navigate to the newly created role in AWS.

Copy the role ARN and paste it into the OpsRamp integration page.
Step 4: Finish up the Integration
To complete the AWS integration:
Navigate to the Filter screen.
From the Filter Criteria type, select Smart Filters.
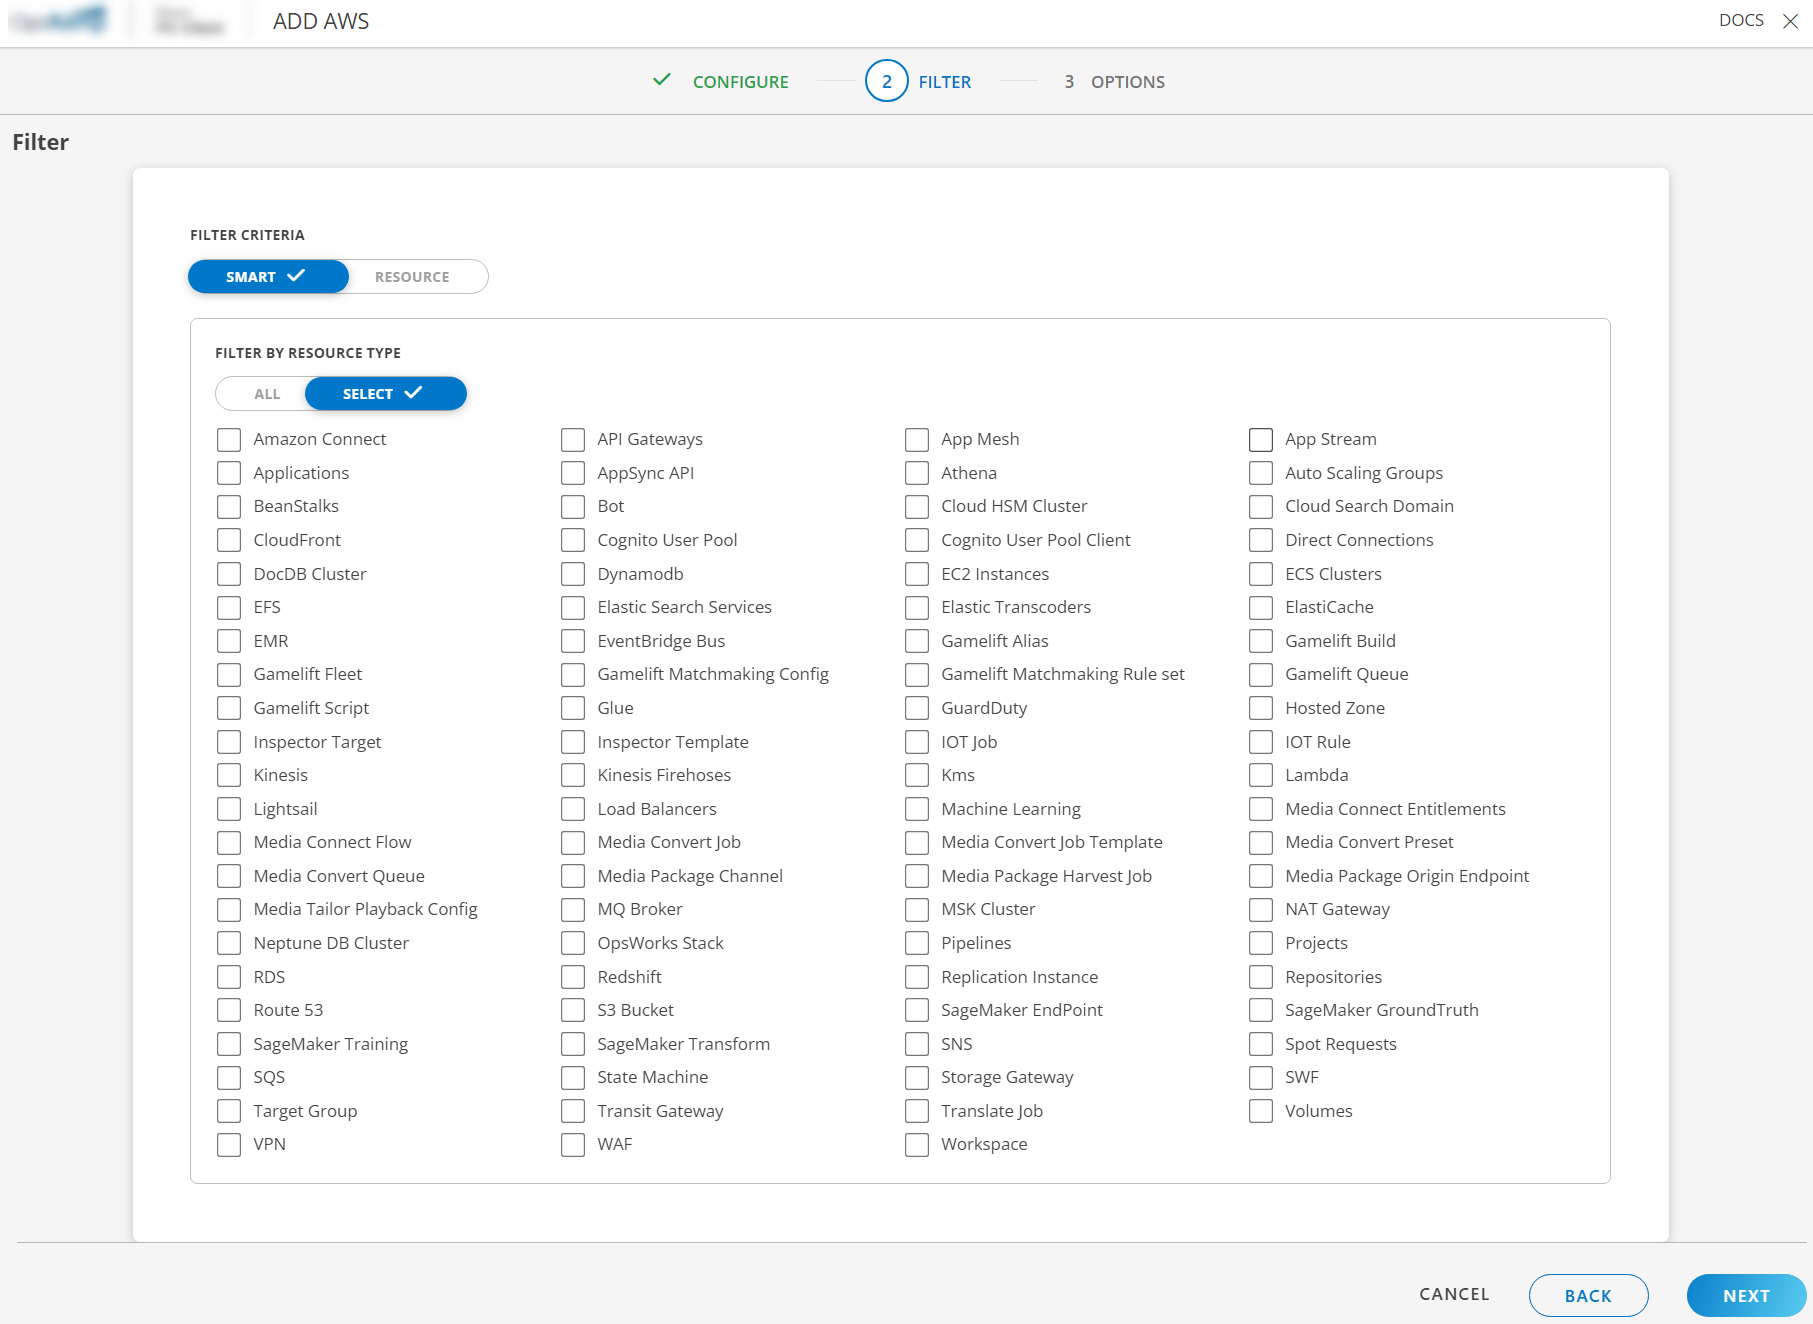
You can choose All resources or choose specific resources to discover from your AWS account. If you would like to select specific resources, check the checkboxes, and select the resources you need.
Click Next.
On the last screen, check Manage Device such that all the discovered resources are in a managed state and choose a discovery schedule (this runs periodically to discover new resources).

See the Appendix for more information about other AWS integration options.
Click Finish.The integration is completed.
Once the integration is completed, you should see your devices being discovered. Navigate to Infrastructure > Search or Infrastructure > Resources to see the discovered resources.
Note: It might take up to 5 minutes to see your resources.
Remove resources
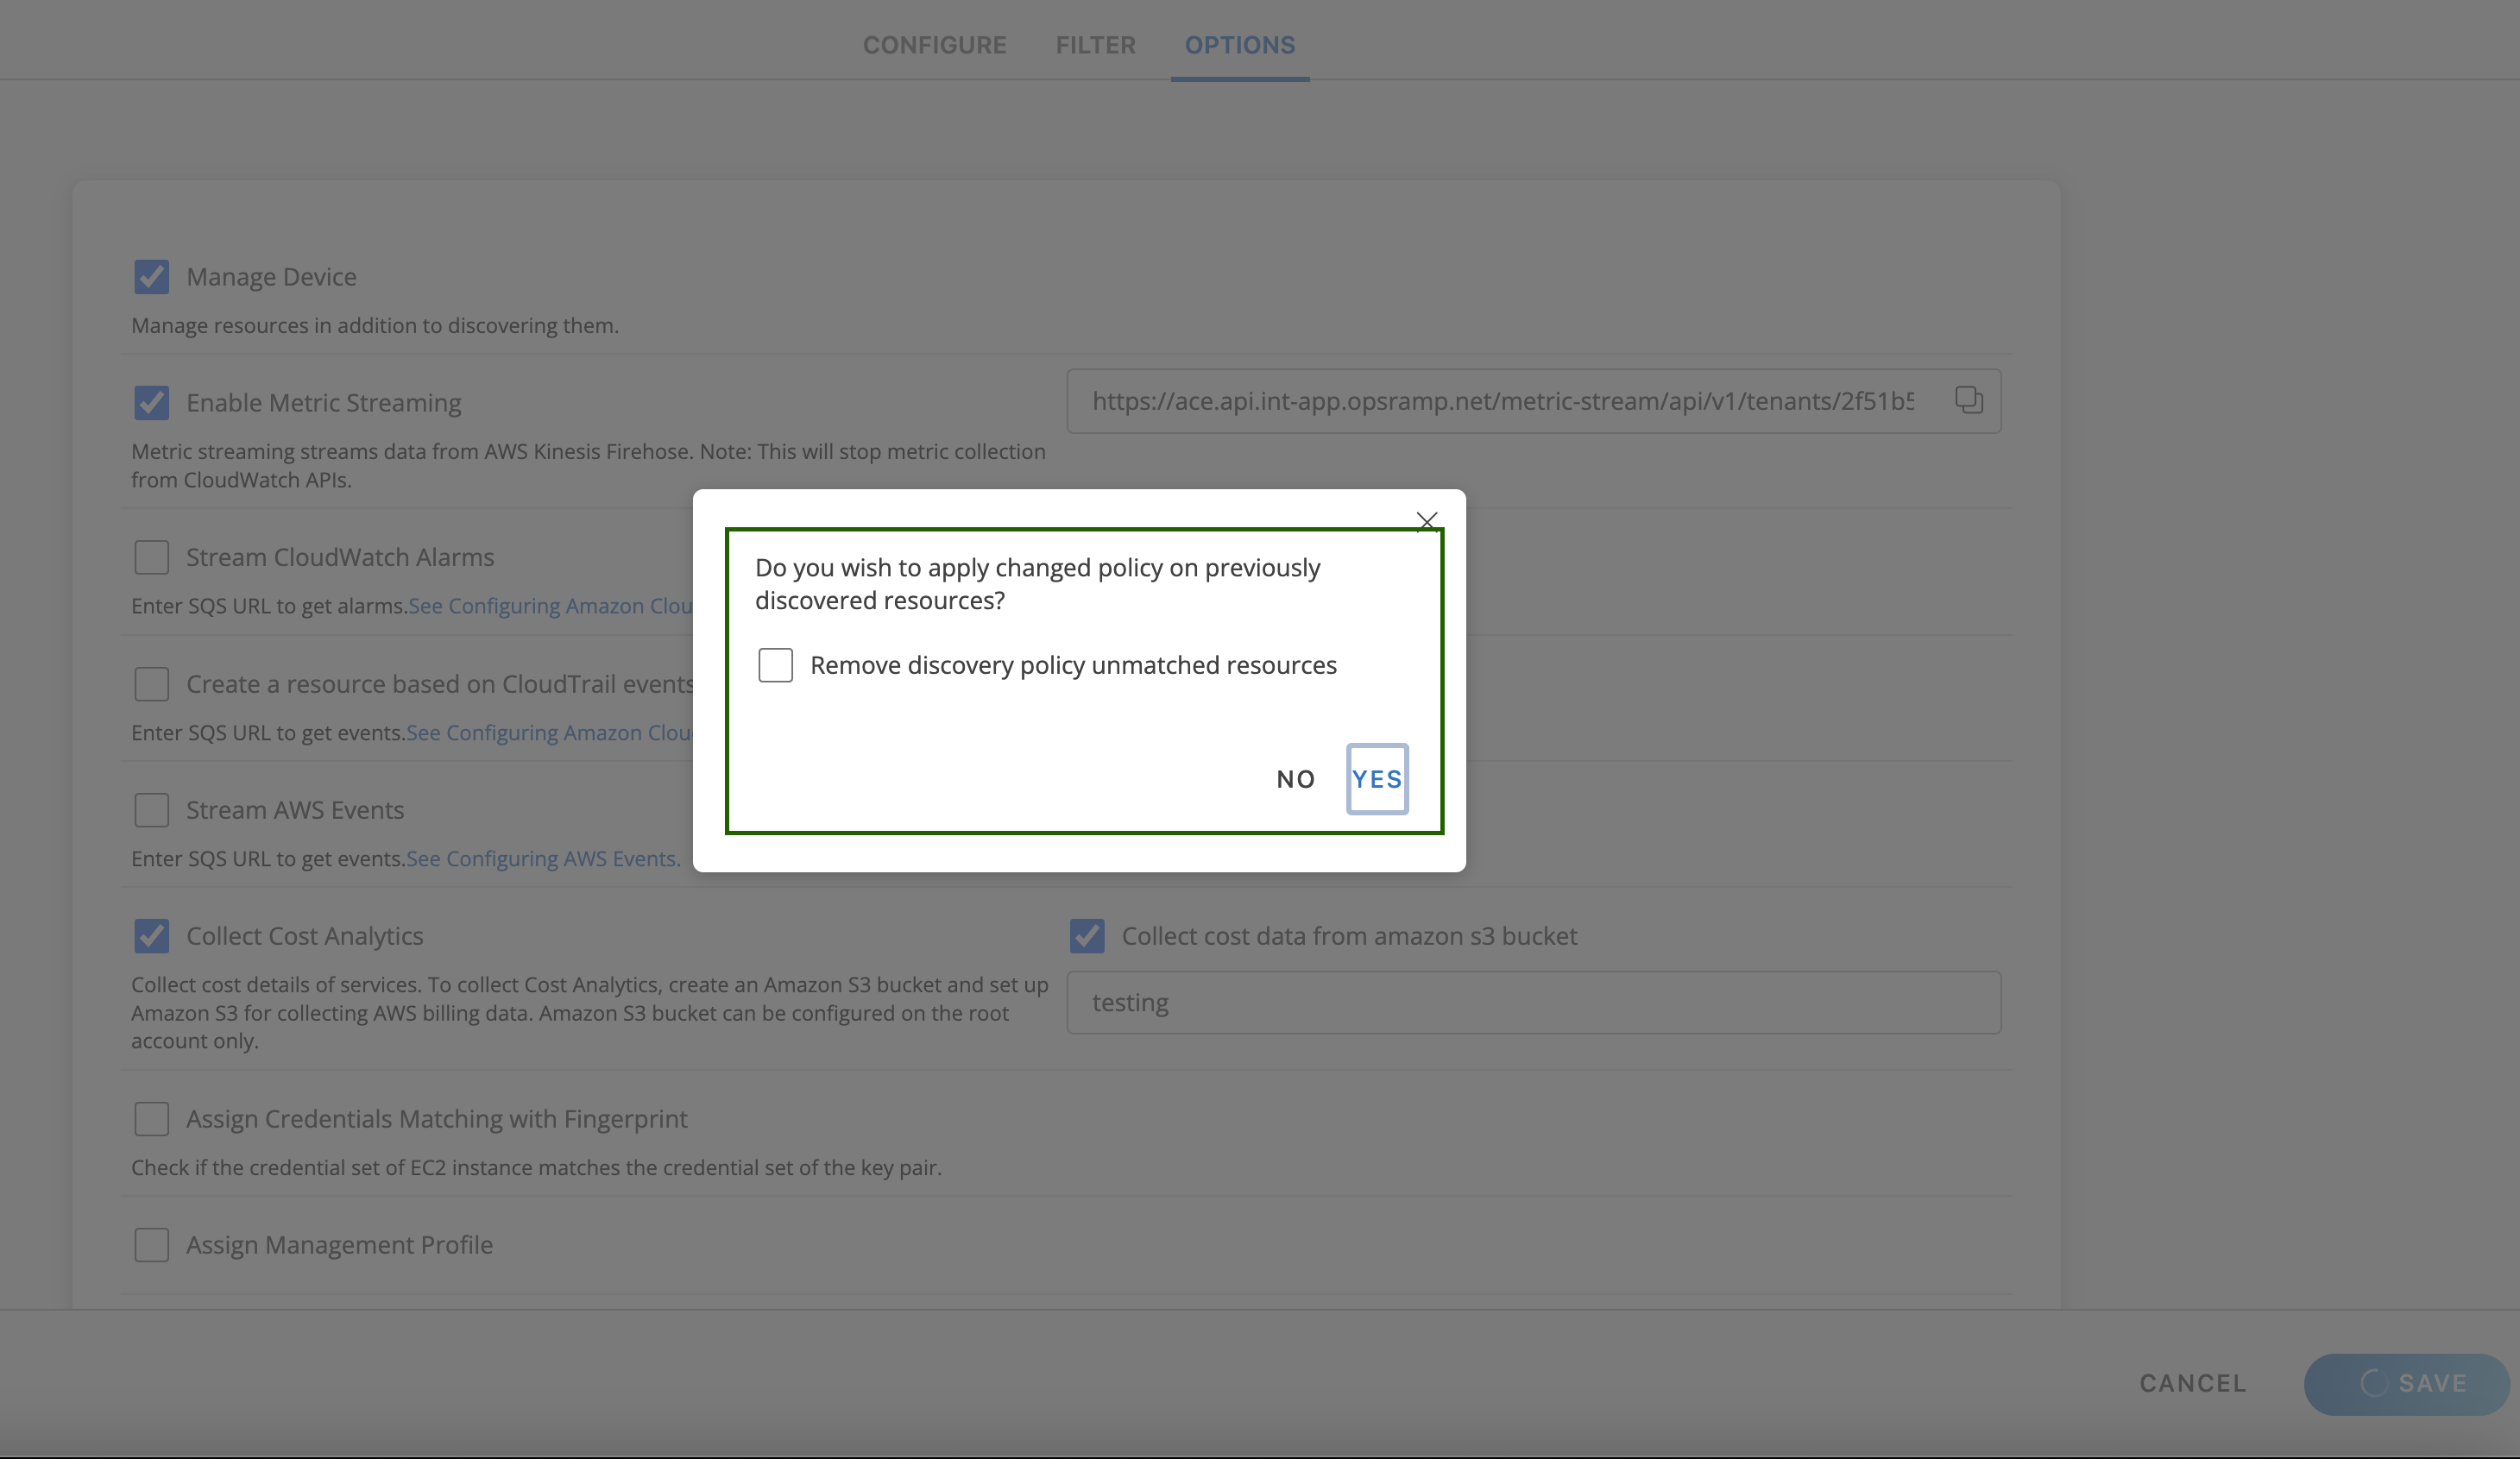
When editing the AWS integration, you can choose whether to keep or remove agent-installed resources. If you edit an instance of the integration and removes a resource type from being discovered, previously discovered resources of that type will now be automatically removed from OpsRamp.
Collect Metrics
Now that you have discovered your AWS resources, you can now start collecting the metrics. See Collect Metrics for more details.
Appendix
If you want to collect logs from AWS, navigate to Infrastructure > Logs and if enabled, follow the steps mentioned in the Log Management.
AWS Integration Options:
- Manage Device: Discover the AWS services in a managed state.
- Enable Metric Streaming: Enable metric streaming from Kinesis Firehose. Note: this will stop metric collection from CloudWatch APIs.
- Stream CloudWatch Alarms: Enter the SQS URL to get alarms. See configuring Amazon CloudWatch alarms.
- Ingest unsupported AWS resource alarms: Process all Amazon CloudWatch alarms and AWS services not supported by OpsRamp.
- Create a resource based on CloudTrail events stream: Enter the SQS URL to get events. See Configuring Amazon CloudTrail.
- Stream AWS Events: Enter the SQS URL to get events. See configuring AWS Events.
- Collect Cost Analytics: Collect project cost details of the services utilized. To collect Cost Analytics, create an Amazon S3 bucket and set up Amazon S3 for collecting AWS billing data. Amazon S3 bucket can be configured on the root account only.
- Assign Credentials Matching with Fingerprint: Check if the credential set of the EC2 instance matches the credential set of the key pair.
- Assign Gateway Management Profile: Select the gateway management profile from the drop-down list.
Integrate AWS using the CloudFormation template
Note
This section does not apply to the Access Keys integration type. It is only applicable for IAM role with External ID or Parent Account Access types.You can integrate your AWS environment with OpsRamp by creating an IAM role with External ID or Parent Account Access using a CloudFormation template provided by OpsRamp. Download the appropriate template from the OpsRamp portal, deploy it using AWS CloudFormation, and use the generated Role ARN to complete the integration setup.
Follow the steps below to create an IAM role with External ID or Parent Account Access in AWS and OpsRamp using the CloudFormation template provided by OpsRamp.
In OpsRamp
Log in to the OpsRamp portal and follow the steps mentioned in AWS configuration to navigate to AWS integration page.
On the ADD AWS page, identify the AWS integration type you want to configure (for example, IAM role with External ID or Parent Account Access).
Download the corresponding CloudFormation YAML template provided by OpsRamp.
Note
- For IAM role with External ID integration, do not close the installation page in OpsRamp after downloading the YAML file. The same External ID file cannot be reused for multiple installations.
- If any changes are made to the downloaded YAML file, ensure that the modified YAML remains in a valid format so it can be successfully processed by AWS.
In the AWS Console
Sign in to the AWS Management Console.
In the search bar, type and open CloudFormation.
Click Create stack > With new resources (standard) and do the following:
- Under Prepare template, choose Choose an existing template.
- Under Specify template, select Upload a template file and upload the YAML file you downloaded from OpsRamp.

Click Next.
Specify Stack Details
- Enter a Stack name.
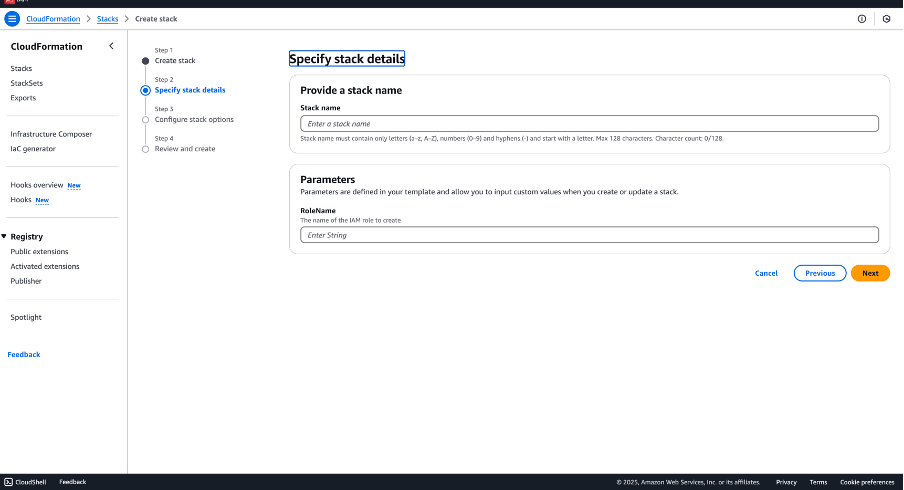
- Fill in the parameters based on the integration type:
- For Parent Account Access:
- Enter the AWS Account Number.
- (Optional) Enter the ExternalId.
- Provide a Role Name.
- For IAM role with External ID:
- Only the Role Name is required.
- For Parent Account Access:
- Click Next, review the configuration, and then click Submit to create the stack.
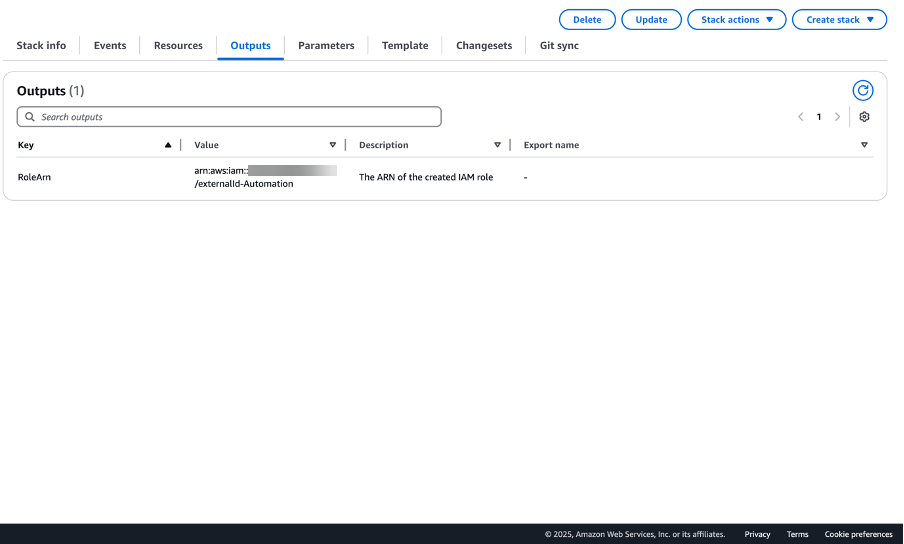
Retrieve the Role ARN
- After the stack is successfully created, navigate to the Outputs tab of the stack.
- Copy the Role ARN displayed there.
- Use this Role ARN to complete the AWS integration setup in OpsRamp.